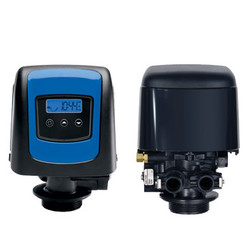
Fleck Valve 2850 Control Valve - Installation
Posted by Pure Aqua, Inc. on Sep 12th 2019
- 14" & 16" Tank Internal Distributors & Laterals. [00:27]
- Strain Relief Fitting. [00:59]
- Apply Sealant to Drain Thread. [01:21]
- Lubricating and Installing the Distributor Screen. [01:54]
- Installing the Transformer Power Cables onto Control Board. [02:52]
- Insert Wire Ends through Valve Strain Relief. [03:10]
- Remove Screw on Controller to Access the Back of Unit. [03:51]
- Ground and Power Cable Installation. [04:17]
- Locate Power Connection Point on Lower-Right Hand Corner. [04:31]
- Push and Hold Tabs Up, Then Insert One Wire Into Each Opening. [04:55]
- Check That The Wires Are Secured In Place. [05:05]
- Remove Screw From Grounding Provision. [05:18]
- Insert Screw Through Ground Wire Lug. [05:24]
- With Wire Secured, Reinsert & Tighten Screw Into Position. [05:31]
- Close Controller Cover & Tighten Screw Back Into Place. [05:42]
- Tighten Strain Relief On The Back of The Valve. [05:54]
- Installing Valve onto Riser Pipe and Tank. [06:05]
- Insert Lubricated Valve onto Riser Pipe End and onto Tank. [07:17]
- Check that the Valve is Properly In Place To Avoid Crossthreading. [07:49]
- Carefully Tighten Valve Onto Tank Without Overtightening. [08:02]
 ENGLISH arrow_drop_down
 ESPAÑOL
 ???????
 PORTUGUÉS
 FRANÇAIS

